|
|
|
|
DRIVE
CHAIN
|
|
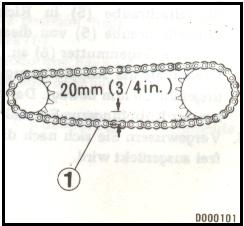
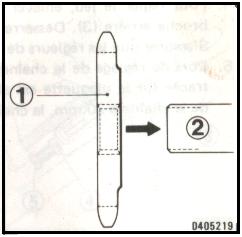
INSPECTION AND ADJUSTMENT: 1. Place the motorcycle on its centre stand, with the transmission in the neutral and the ignition switch off. 2. Turn the rear wheel slowly, and inspect the drive chain and sprockets for damage, wear, dry or rust. Drive chain and/or sprocket (s) with damage or worn must be replaced. Chain which appears dry or shows signs of rust requires supplemental lubrication. 3. Move the chain (1) up and down with your fingers and measure the amount of slack. The slack should be adjusted to 20mm (3/4in.) and never be allowed to exceed 50mm (2 in.)
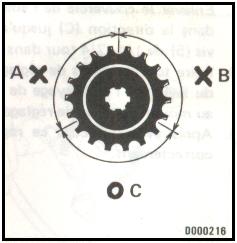
(A) Damaged sprocket teeth. (B) Worn sprocket teeth. (C) Normal sprocket teeth.
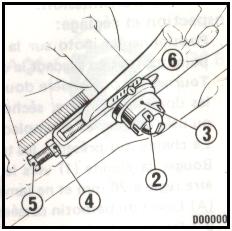
4. To adjust the slack, remove the rear axle nut cotter pin (2) and loosen the rear axle nut (3). Loosen the lock nuts (4) and turn the adjusting bolts (5) as necessary. Make sure the chain adjuster on sides are at the same index mark (6) locations.
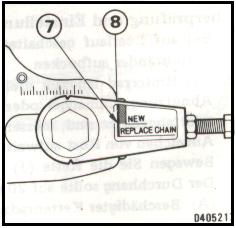
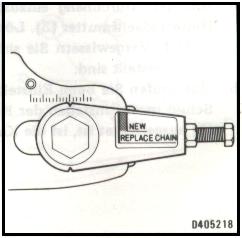
5. Check the chain wear label when adjusting the chain. If the red line (7) on the label aligns with the rear of the swing arm (8) after the chain has been adjusted to 20mm (3/4 in.) slack, the chain is excessively worn and must be replaced.
REPLACEMENT: 1. Install the drive sprocket (1) to the drive shaft (2) so that its stepped face is toward the inside.
2. When a new drive chain is installed, a new wear label must be attached according to the directions provided with the replacement chain. Since new chain lengths vary slightly, proper label placement is necessary to provide an accurate wear and replacement indication.
CAUTION: Never install a new drive chain on badly worn sprockets, or use new sprockets with a badly worn drive chain. |